Micro-ROS Ping Pong
Run the micro-ROS example

Introduction
Section titled “Introduction”Before reading this article, please take a look at Install micro-ROS build system slice from ROS2 Humble Basics.
Architecture
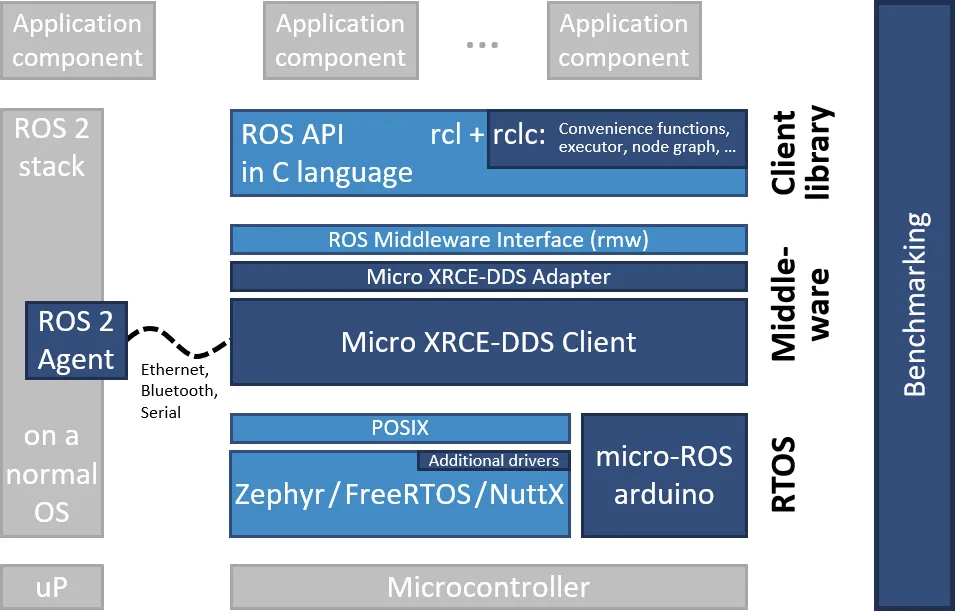
Section titled “Architecture”The architecture of the micro-ROS stack follows the ROS 2 architecture. Dark blue components are developed specifically for micro-ROS. Light blue components are taken from the standard ROS 2 stack.
Communication Flow
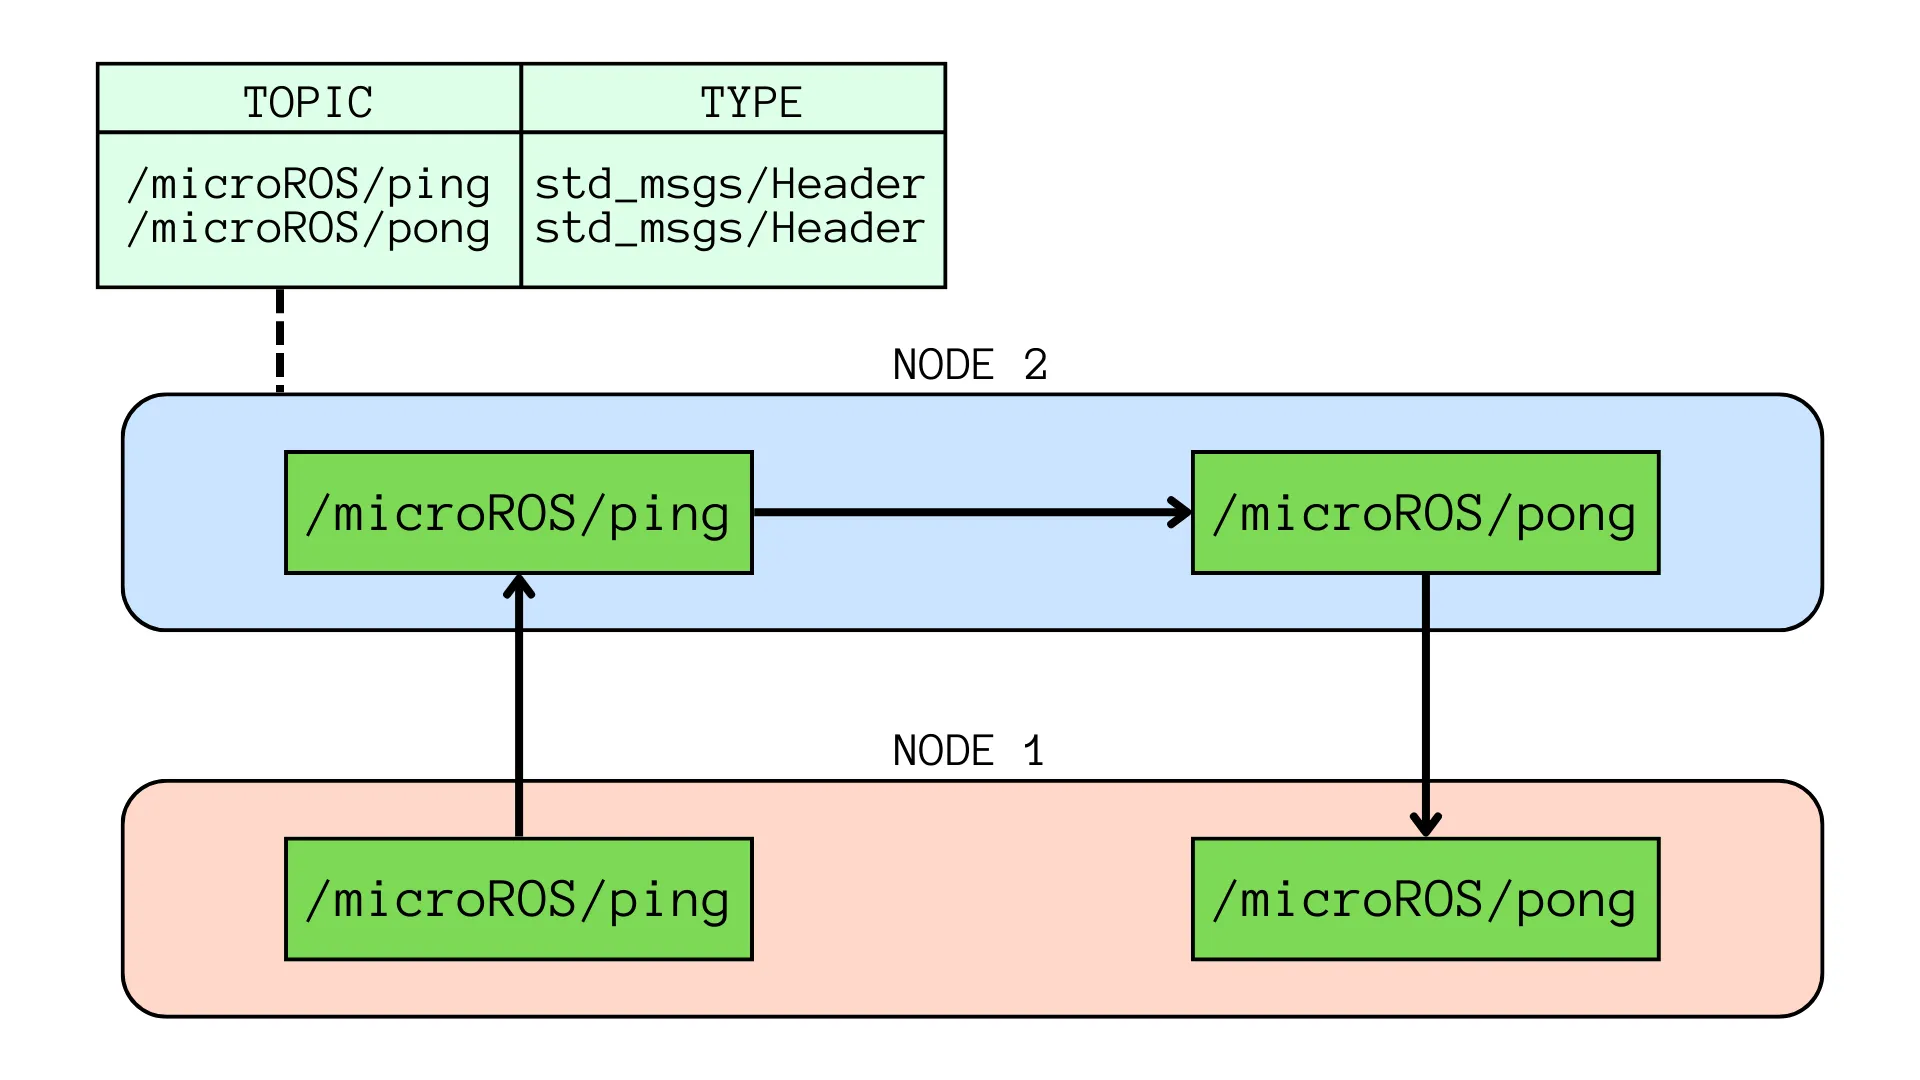
Section titled “Communication Flow”This blog shows a node with two publisher-subscriber pairs associated with ping and pong topics.
The node sends a ping package using a ping publisher.
If the ping subscriber receives a ping from an external node, the pong publisher reply with a pong.
To test if the logic works, it has been implemented a communication with a ROS 2 node that:
- listens to the topics published by the
pingsubscriber - publishes a
fake_pingpackage, received by the micro-ROSpingsubscriber. - The
pongpublisher on the micro-ROS application will then publish apong: it received thefake_pingcorrectly
The diagram below shows the communication flow:
Build the firmware
Section titled “Build the firmware”Since you’ll be using different Terminal windows, let’s name them: the first one will be T1.
First of all, let’s locate ping_pong directory from microros_workspace, that were created in ROS2 Humble Basics article and setup the workspace.
It was in the home directory, so let’s open a terminal and type:
cd ~/microros_workspace/src/micro_ros_setup/scripts
# build the firmware and source the local installationros2 run micro_ros_setup build_firmware.shsource install/local_setup.bash
Create the micro-ROS agent
Section titled “Create the micro-ROS agent”The micro-ROS application is now ready to be connected to a micro-ROS agent to start talking with the rest of the ROS 2 world. Let’s first create a micro-ROS agent: source /opt/ros/$ROS_DISTRO/setup.sh
# download micro-ROS-Agent packagesros2 run micro_ros_setup create_agent_ws.sh
# build the agent packages and source the installationros2 run micro_ros_setup build_agent.shsource install/local_setup.bash
Run the micro-ROS app
Section titled “Run the micro-ROS app”Both the client and the agent are correctly installed in the host machine. To give micro-ROS access to the ROS 2 dataspace, run the agent:
# run a micro-ROS agentros2 run micro_ros_agent micro_ros_agent udp4 --port 8888Then open a new terminal window (T2) to run the micro-ROS node:
source /opt/ros/$ROS_DISTRO/setup.shsource install/local_setup.sh
# use RMW Micro XRCE-DDS implementationexport RMW_IMPLEMENTATION=rmw_microxrcedds
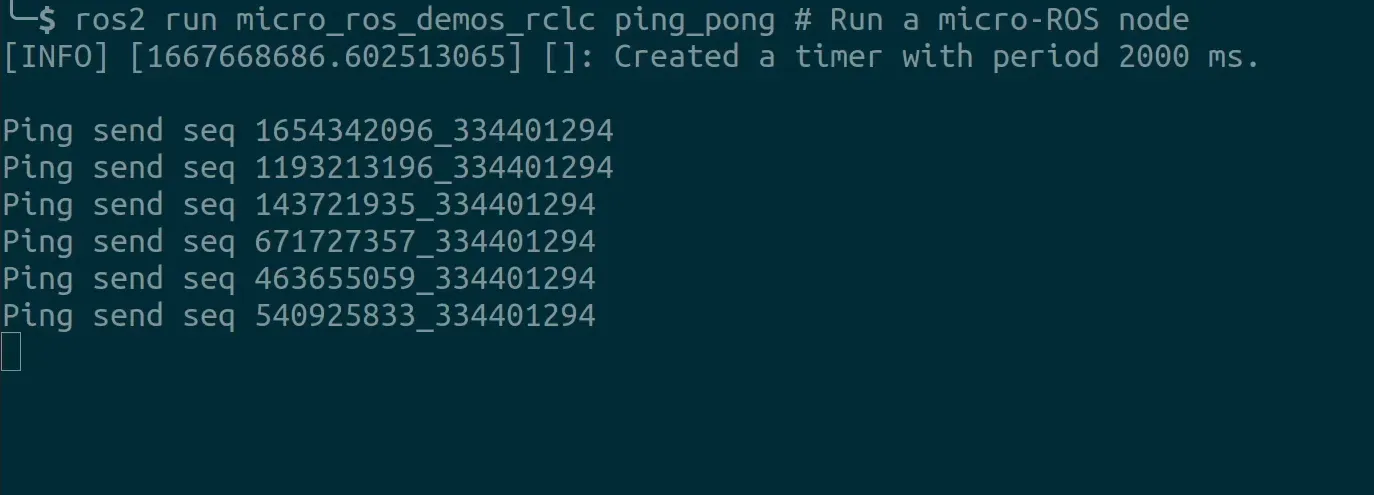
# run a micro-ROS noderos2 run micro_ros_demos_rclc ping_pongThe output will be:
Testing the micro-ROS app
Section titled “Testing the micro-ROS app”To check that everything is working, open a Terminal window (T3) and listen to the ping topic with ROS 2 to check whether the micro-ROS Ping Pong node is correctly publishing the expected pings:
source /opt/ros/$ROS_DISTRO/setup.sh
# subscribe to micro-ROS ping topicros2 topic echo /microROS/ping
T1 next to T2 (on the right) looks like:

Let’s open T3* to subscribe to the pong topic:
source /opt/ros/$ROS_DISTRO/setup.sh
# subscribe to micro-ROS pong topicros2 topic echo /microROS/pong
Now take T2 and interrupt the running command with Ctrl + C (will be indicated with ^C), then publish a fake_ping with ROS 2:
# send a fake pingros2 topic pub --once /microROS/ping std_msgs/msg/Header '{frame_id: "fake_ping"}'You should see the fake_ping in the pong subscriber console.
Conclusion
Section titled “Conclusion”Documentation
Section titled “Documentation”Here is the full list of links I used to write this article: