ROS2 Humble Basics
Introduction
Section titled “Introduction”The Robot Operating System (ROS) is a set of software libraries and tools for building robot applications.
Since ROS was started in 2007, a lot has changed in the robotics and ROS community.
The goal of the ROS 2 project is to adapt to these changes.
Most of the setup scripts you’ll see below were written for different shells (bash, sh and zsh), so that you can run the one you prefer (based on your shell).
You can figure out what’s your current shell by using this command:
echo $SHELLPlease Note: For convenience, in the snippets below I’ll always use .sh scripts (despite I personally use .zsh shell), since sh is the most common shell.
Install ROS2 on Ubuntu
Section titled “Install ROS2 on Ubuntu”The first step to start building ROS application is to add ROS 2 apt repository to your machine. Let’s make sure that the Ubuntu Universe repository is enabled:
apt-cache policy | grep universeIf you do not see an output line like the one below:
500 http://security.ubuntu.com/ubuntu jammy-security/universe amd64 Packages release v=22.04,o=Ubuntu,a=jammy-security,n=jammy,l=Ubuntu,c=universe,b=amd64Then, enable the Universe repository:
sudo apt install software-properties-commonsudo add-apt-repository universeAdd the ROS 2 apt repository to the system:
# authorize GPG key with apt.sudo apt update && sudo apt install curl gnupg lsb-releasesudo curl -sSL https://raw.githubusercontent.com/ros/rosdistro/master/ros.key -o /usr/share/keyrings/ros-archive-keyring.gpg
# add the repository to your sources list.echo "deb [arch=$(dpkg --print-architecture) signed-by=/usr/share/keyrings/ros-archive-keyring.gpg] http://packages.ros.org/ros2/ubuntu $(source /etc/os-release && echo $UBUNTU_CODENAME) main" | sudo tee /etc/apt/sources.list.d/ros2.list > /dev/null
Update your apt repository caches after setting up the repositories. ROS 2 packages are built on frequently updated Ubuntu systems. It is always recommended that you ensure your system is up-to-date before installing new packages.
sudo apt update && sudo apt upgardeUbuntu (Debian)
Section titled “Ubuntu (Debian)”You can choose your preferred installation:
# Desktop Install (Recommended): ROS, RViz, demos, tutorialssudo apt install ros-humble-desktop
# or ROS-Base Install (Bare Bones): communication libraries, message packages, command line tools (no GUIs)sudo apt install ros-humble-ros-base
Since there are many ROS distributions, it’s a good practice to store the distro you’re currently using in a variable called $ROS_DISTRO.
Add the following line to your configuration file: (.bashrc, .zshrc, …)
export ROS_DISTRO="humble"Talker/Listener Demo
Section titled “Talker/Listener Demo”To test if you have correctly installed ROS2 on your machine, let’s run the “Talker/Listener” demonstration.
Open a terminal window and type:
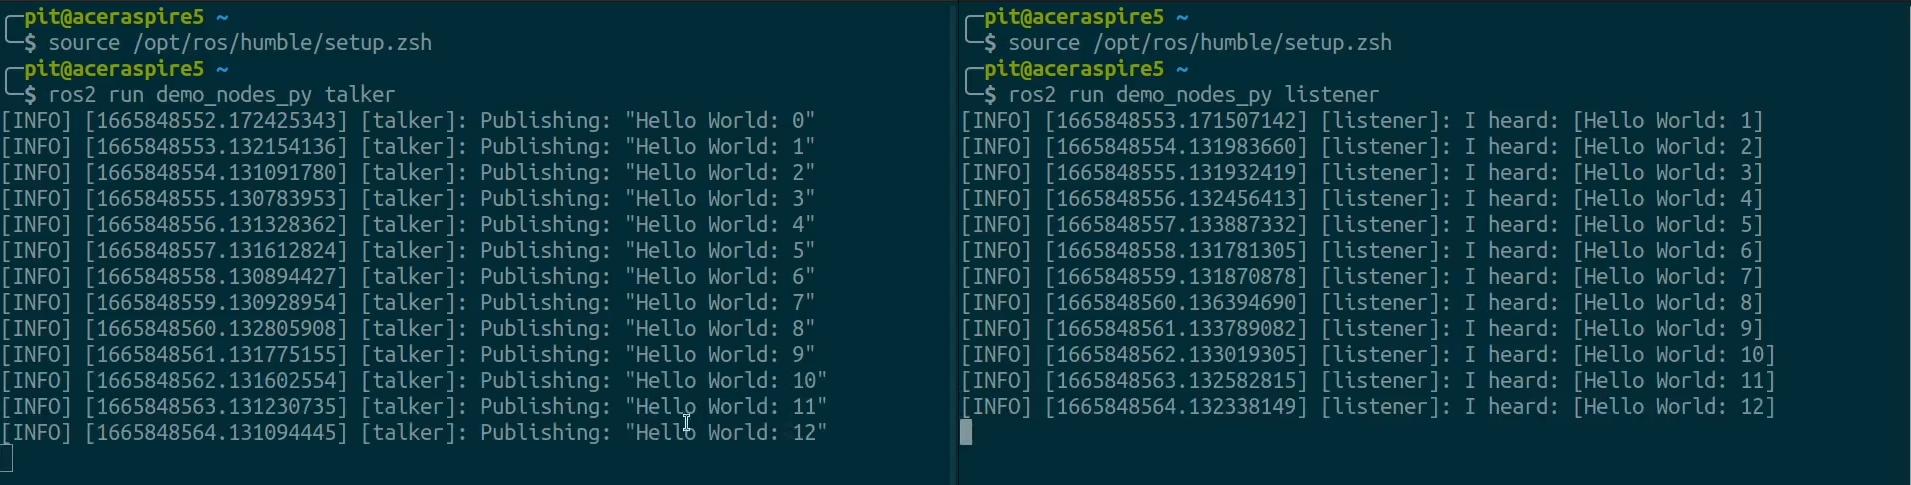
# command for ZSH: source /opt/ros/humble/setup.zshsource /opt/ros/$ROS_DISTRO/setup.shros2 run demo_nodes_py talkerThen, open a second terminal window and type:
source /opt/ros/$ROS_DISTRO/setup.shros2 run demo_nodes_py listenerYou should now see the terminals “talking” to each other:
Install the micro-ROS build system
Section titled “Install the micro-ROS build system”Workspace setup
Section titled “Workspace setup”The instructions below will set up a workspace with a ready-to-use micro-ROS build system.
source /opt/ros/$ROS_DISTRO/setup.sh
# create a workspace and download the micro-ROS toolsmkdir microros_workspace && cd microros_workspacegit clone -b $ROS_DISTRO https://github.com/micro-ROS/micro_ros_setup.git src/micro_ros_setup
# update dependencies using rosdep toolsudo apt update && sudo apt upgradesudo apt install -y python3-rosdep2rosdep updaterosdep install --from-paths src --ignore-src -y
# install pip and colcon (collective construction)sudo apt install python3-pip python3-colcon-core
# optionally install the ZSH extensionsudo apt install python3-colcon-zsh
# build micro-ROS toolscolcon buildsource install/local_setup.sh
The final output will be:
Starting >>> micro_ros_setupFinished <<< micro_ros_setup [0.92s]
Summary: 1 package finished [1.10s]
The build system’s workflow consists of:
- Create: Download the required repositories and cross-compilation toolchains for the given hardware platform
- Configure: Select which app has to be cross-compiled by the toolchain, in addition to set other options (transport, agent’s IP address/port, device ID, …)
- Build: The cross-compilation takes place and the platform-specific binaries are generated
- Flash: The generated binaries are flashed onto the hardware platform memory (allow the micro-ROS app execution)
Create new firmware workspace
Section titled “Create new firmware workspace”Once the build system is installed, let’s create a firmware workspace.
Assuming the terminal’s current directory is still microros_workspace, let’s type:
cd src/micro_ros_setup/scriptsros2 run micro_ros_setup create_firmware_ws.sh hostThe scripts will create firmware and src directories.
From scripts directory, let’s move to rclc sub-directory, where were downloaded a set of micro-ROS apps for Linux:
cd src/uros/micro-ROS-demos/rclcpwd # check the present working directory, just to clarify$HOME/microros_workspace/src/micro_ros_setup/scripts/src/uros/micro-ROS-demos/rclcEach app is a folder containing:
main.c(application logic)CMakeLists.txt(CMake file containing the script to compile the app)
Take a look at Ping Pong micro-ROS blog post.
Create custom application
Section titled “Create custom application”If you want to create your custom application, you need to register the app folder (for example <my_app>) in this location, containing the two files described above.
Any new application folder needs to be registered in /rclc/CMakeLists.txt file by adding the following line:
export_executable(<my_app>)Conclusion
Section titled “Conclusion”This article is not yet finished: I just wanted to publish it as a work in progress until I’ll be done learning the basics of ROS 2.
You can follow me along the way, isn’t it wonderful?
Documentation
Section titled “Documentation”Here is the full list of links I used to write this article: