Introduction
Adafruit Industries was founded in 2005 by MIT engineer Limor “Ladyada” Fried.
Over the years, Adafruit has built tons of Arduino-compatible boards, shields, accessories, books and libraries thus expanding the open source ecosystem created around, but not limited to, Arduino world.
A peculiarity of Adafruit products is the possibility of being programmed directly in Python by using CircuitPython, which is Adafruit’s beginner-oriented flavor of MicroPython. It is designed specifically to run on microcontroller boards.
This blog post aims to introduce you to the Adafruit world. To do so, we’ll set up the popular Metro M0 Express board to work with both CircuitPython and Arduino language.
Technical Details
Here is a detailed list of specifications for Adafruit’s Metro M0 Express board:
- Processor:
ATSAMD21G18ARMCortexM0processor clocked at48MHz,32.768 KHzcrystal for clock generation &RTC
- Memory:
256KBof FLASH memory and32KBof RAM,2MBSPIFlash chip,- No
EEPROMmemory
- Logic/Power:
3.3Vlogic/power,3.3Vregulator with500mApeak current output
- 25
GPIOpins:- n°6
12-bitanalog inputs, - a
10-bitanalog output (DAC), - built-in NeoPixel on pin
#40
- n°6
- Communication:
- Hardware Serial,
- Hardware
I2C, - Hardware
SPIsupport, USBnative support
- Other:
- Power on/off switch,
- 71mm x 53mm / 2.8” x 2.1” dimension,
- Height (w/ barrel jack): 13mm / 0.5”,
- Weight: 20g
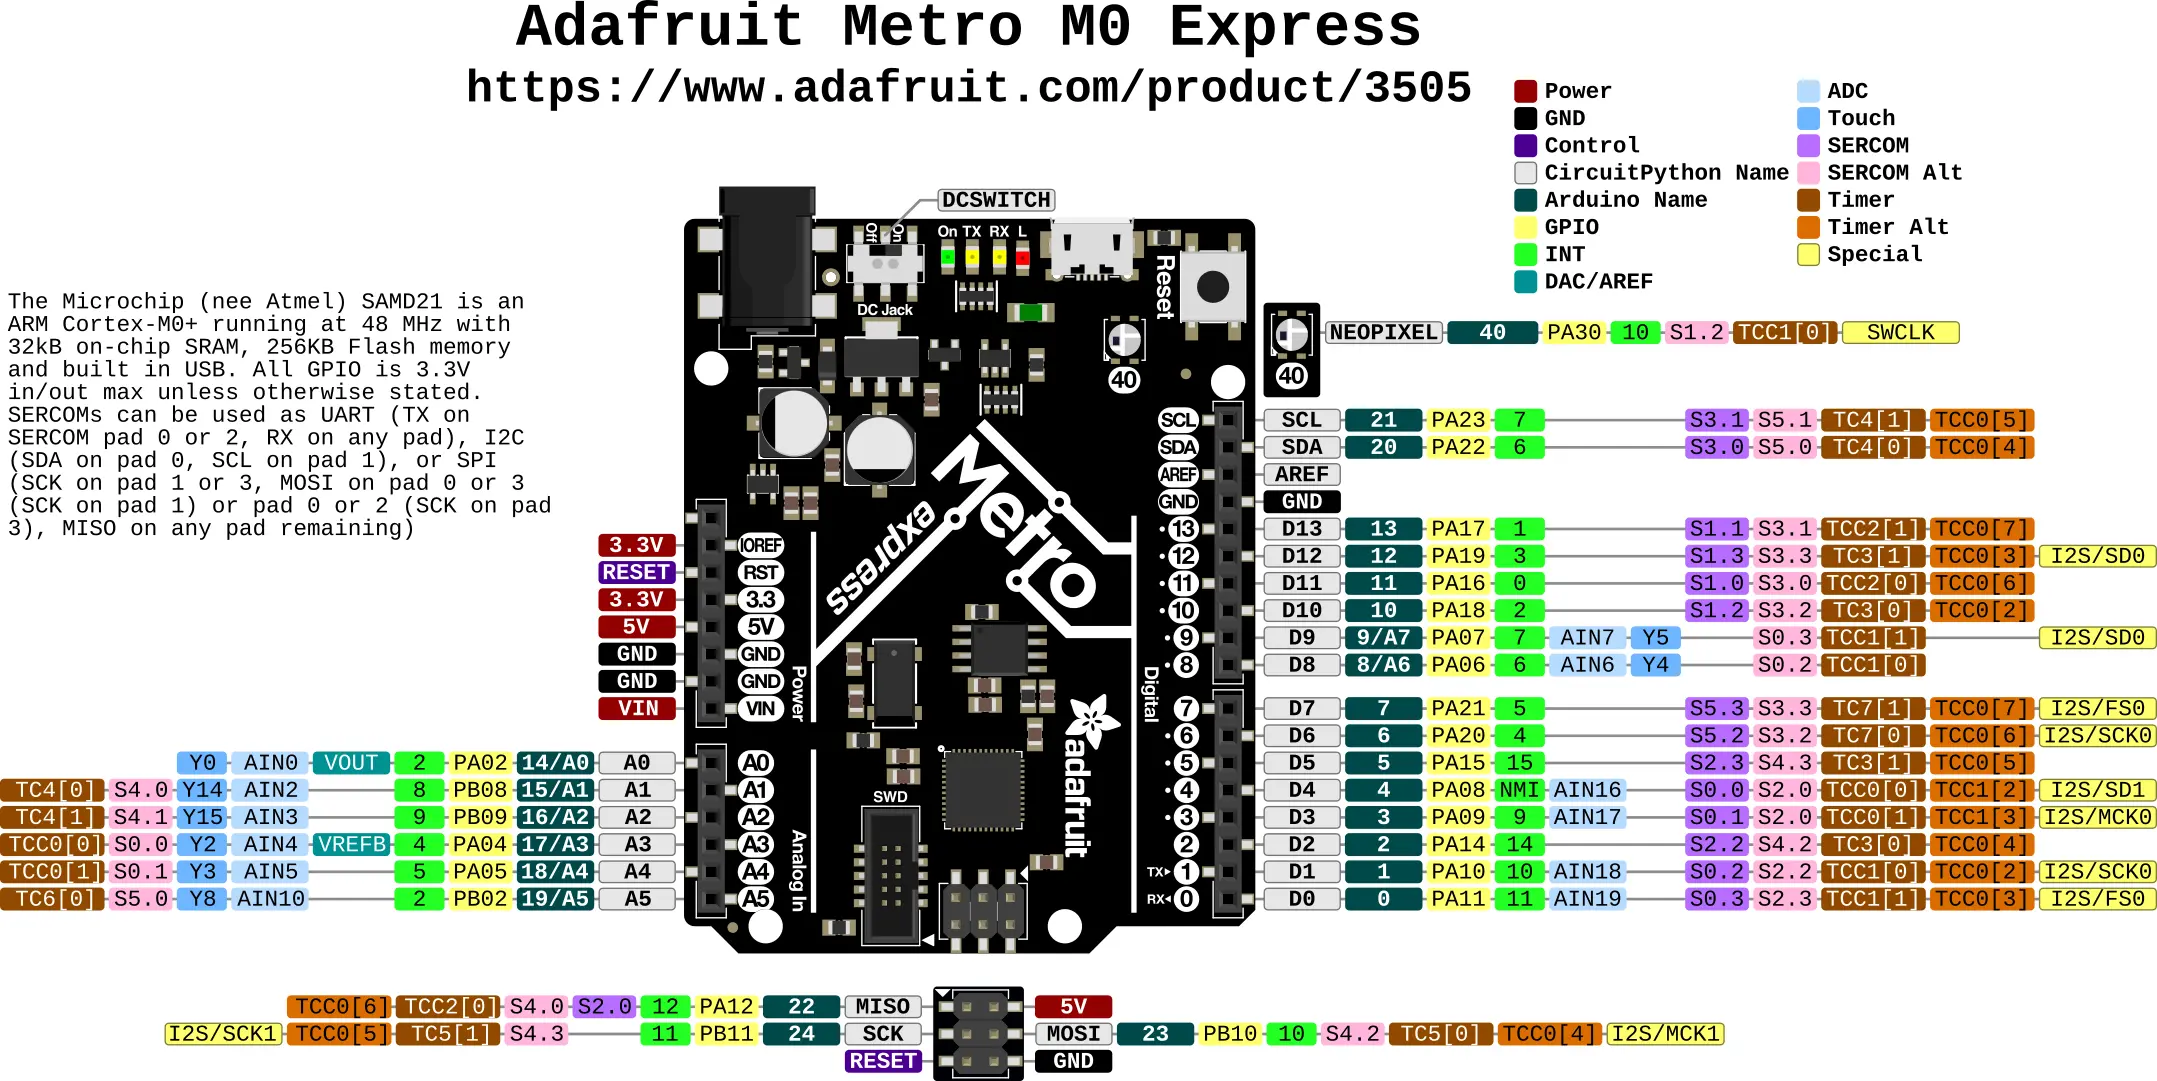
Native USB
There’s no need for a hardware USB to Serial converter as the Metro M0 has built in USB support. When used to act like a serial device, the USB interface can be used by any computer to listen/send data to the METRO, and can also be used to launch and update code via the bootloader.
Native USB support allows the board to act like a keyboard, mouse or MIDI device.
Boards like Arduino Leonardo or Arduino Micro have the same capability!
Reprogramming
Easy reprogramming, comes pre-loaded with the UF2 bootloader, which looks like a USB storage key.
Simply drag firmware on to program. It can be used to load up CircuitPython, PXT/MakeCode or Arduino IDE (it is bossa-compatible).
Arduino IDE
To allow your Metro M0 Express board to work with Arduino IDE you need to start the IDE and navigate to the Preferences menu.
In the Additional Boards Manager URLs, you need to add the following URL:
https://adafruit.github.io/arduino-board-index/package_adafruit_index.jsonTo find the most up-to-date list of URLs you can add, please visit the list of third party board URLs on the Arduino IDE wiki.
Here’s a short description of each of the Adafruit supplied packages that will be available in the Board Manager when you add the URL:
- Adafruit AVR Boards: support for Flora, Gemma, Feather 32u4, Trinket, & Trinket Pro.
- Adafruit SAMD Boards: support for Feather M0, Metro M0, Circuit Playground Express, Gemma M0 and Trinket M0
- Arduino Leonardo & Micro MIDI-USB: adds MIDI over USB support for the Flora, Feather 32u4, Micro and Leonardo using the arcore project.
If you have multiple boards you want to support, say ESP8266 and Adafruit, have both URLs in the text box separated by a comma.
Once done click OK to save the new preference settings.
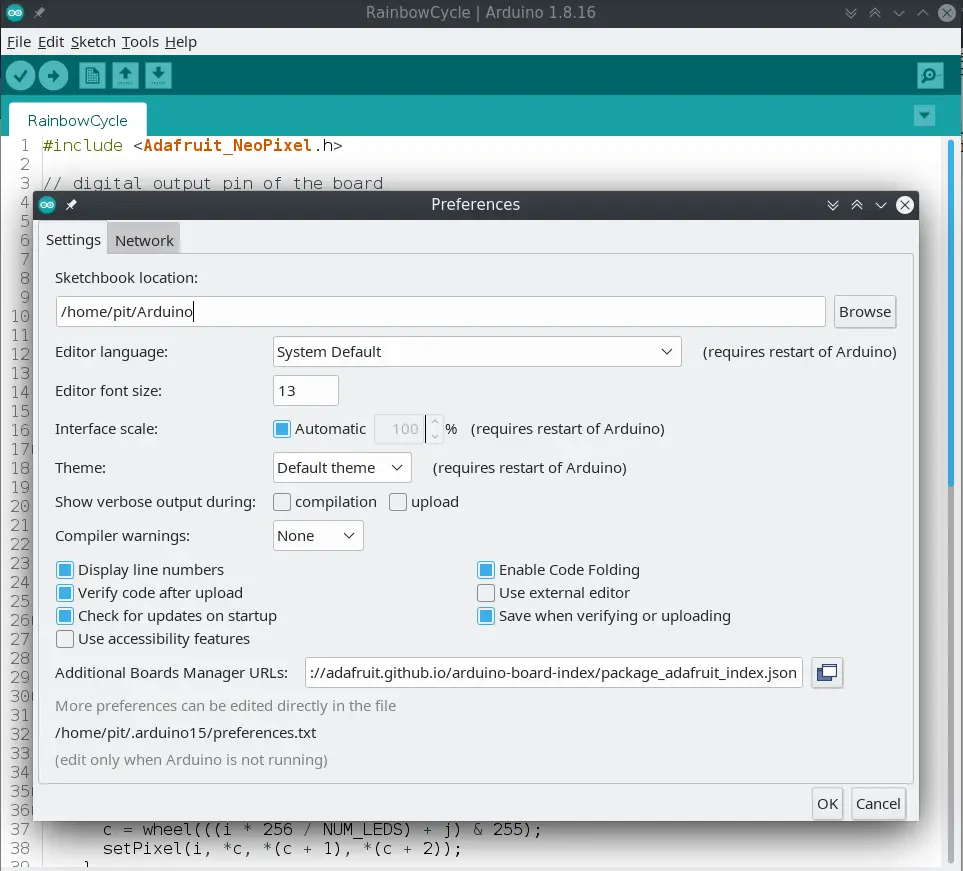
Now that you have added the appropriate URLs, you can open the Boards Manager by navigating to the Tools > Board menu.
Install both Arduino SAMD Boards and Adafruit SAMD libraries:
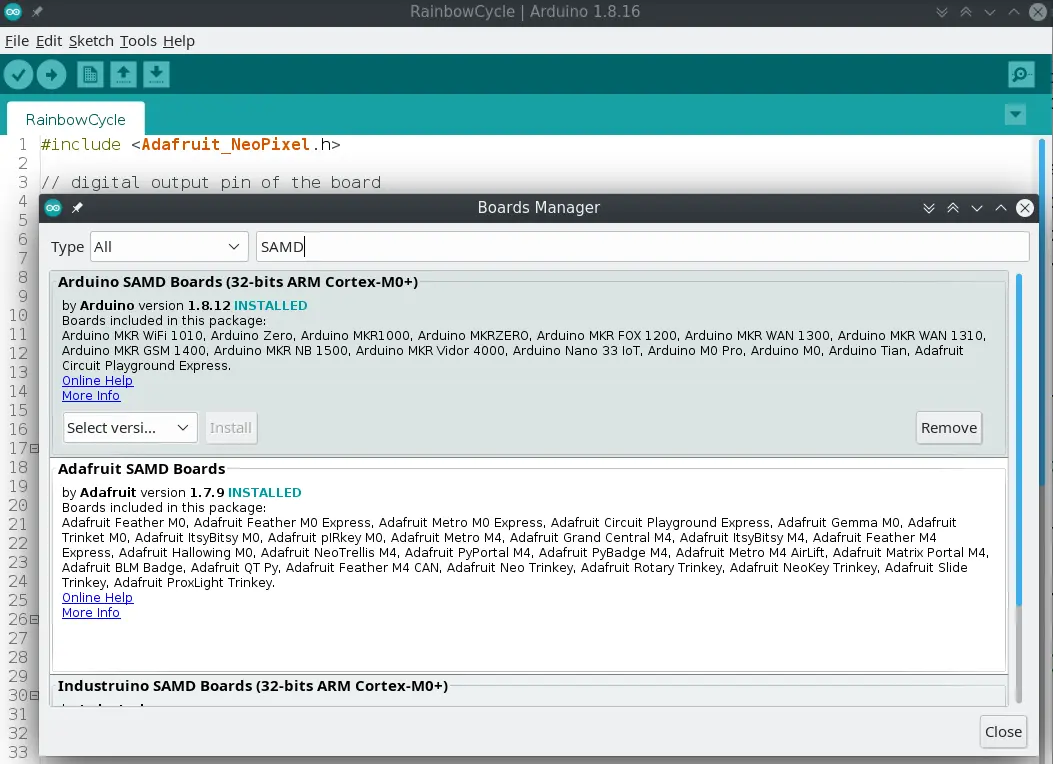
Reboot the IDE just to be sure everything has been installed correctly.
You are now able to work with Metro M0 Express board and code in Arduino language!
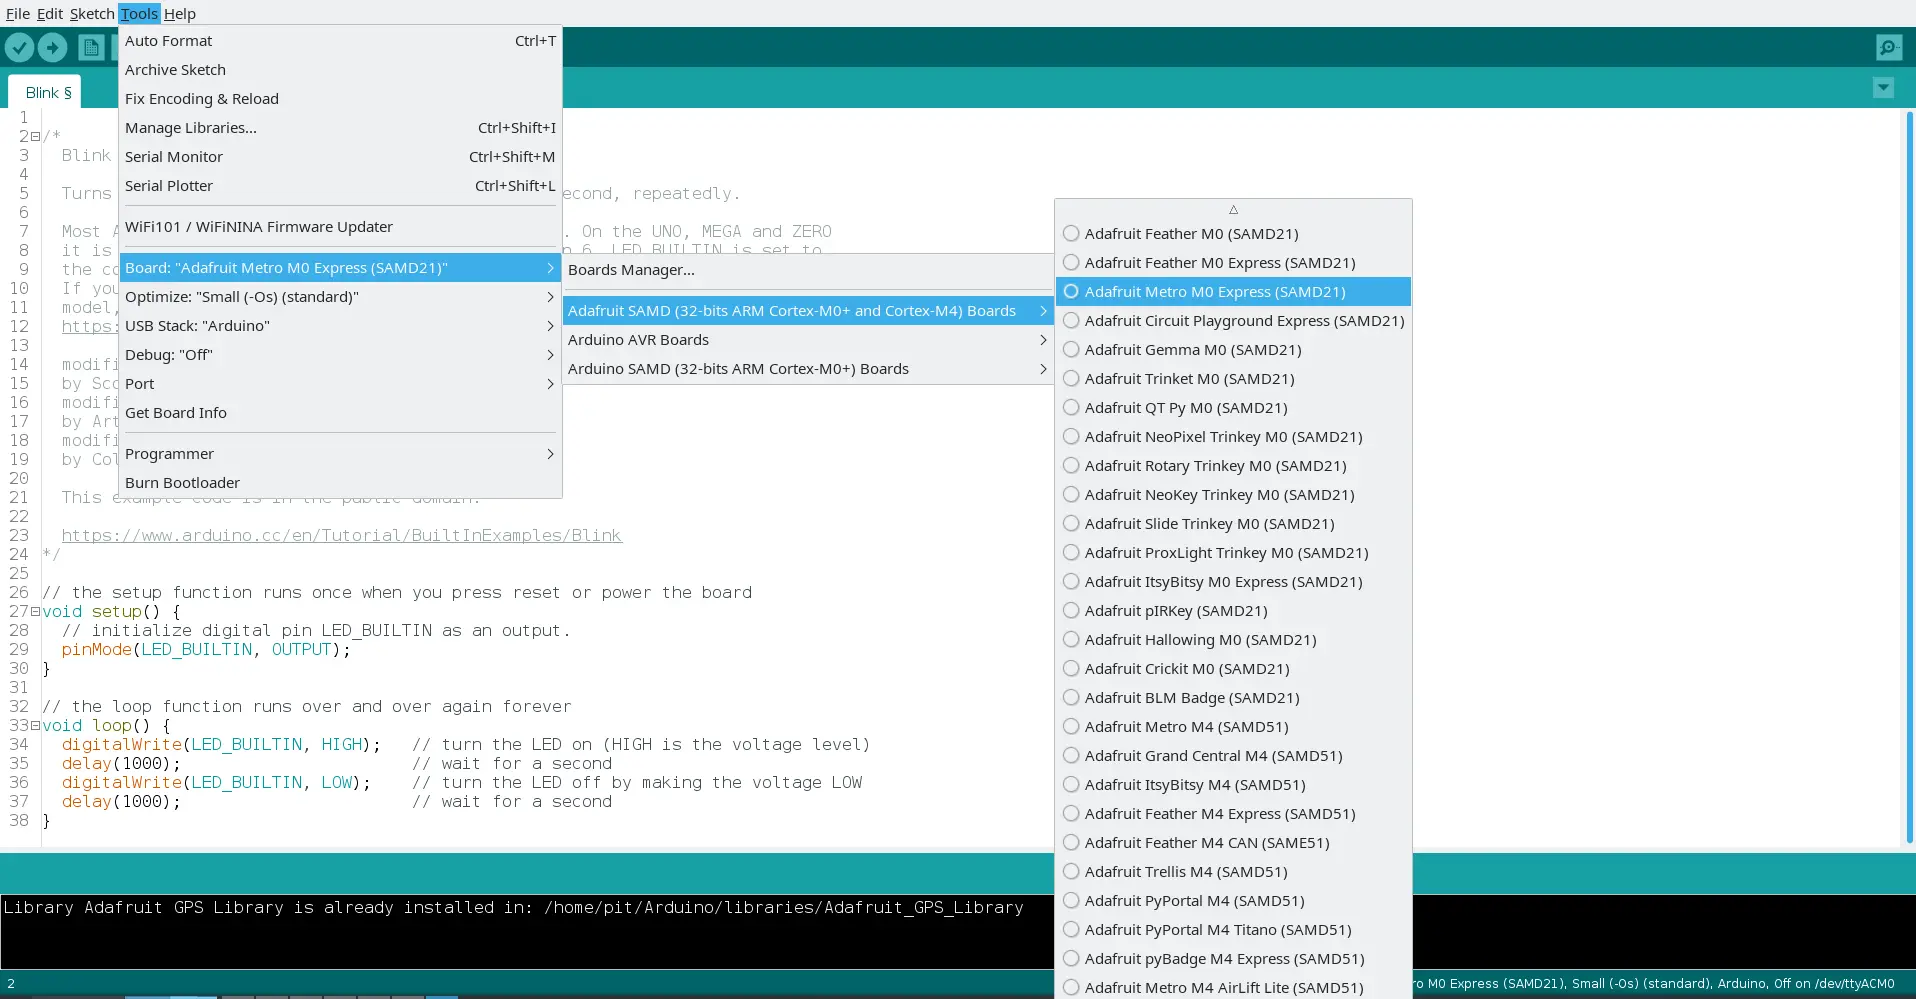
Plug the board and select the right Port:
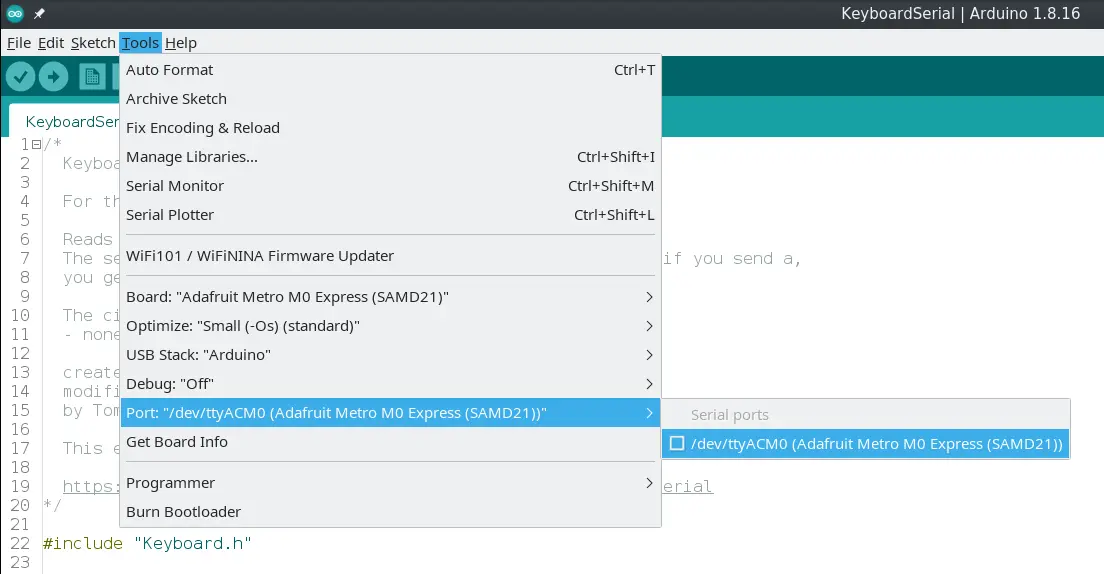
Since the board has native USB support, some interesting libraries you can work with are:
CircuitPython
CircuitPython is designed to simplify experimentation and education on low-cost microcontrollers. It makes it easier than ever to get prototyping by requiring no upfront desktop software downloads.
Simply copy and edit files on the CIRCUITPY drive to iterate.
Install CircuitPython
The first thing you need to do is download the most recent version of CircuitPython from downloads page. Use the search box to find your board. In this case, let’s download the software for Metro M0 Express board:
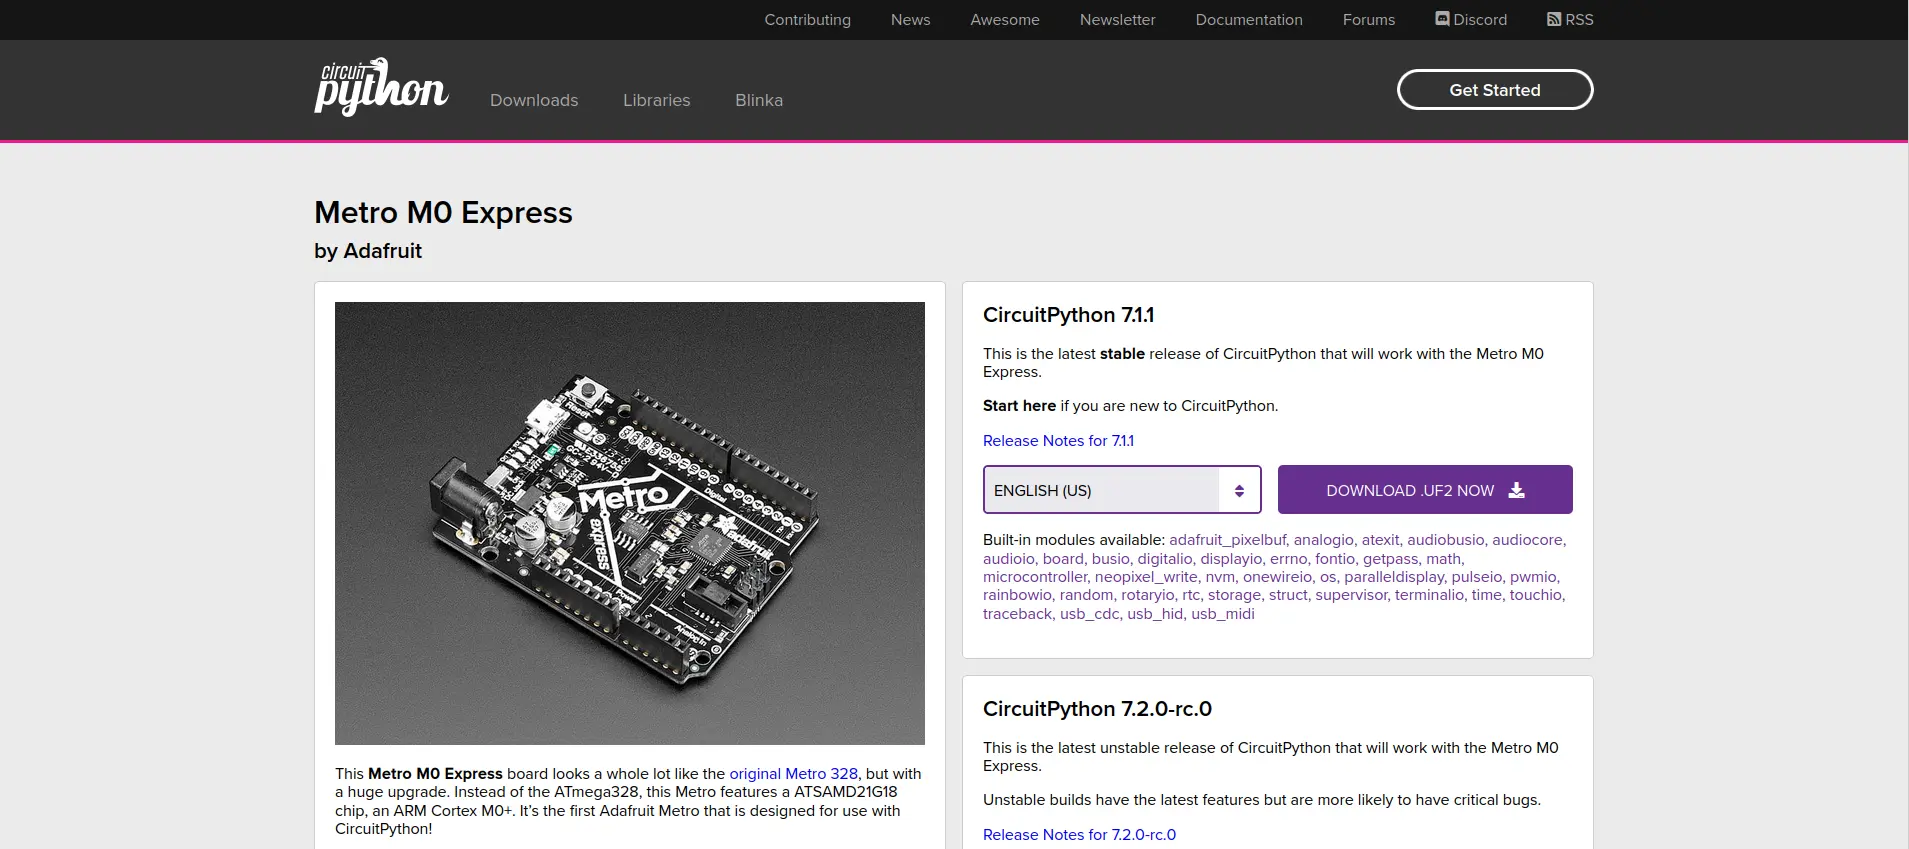
Please Note: Always backup your code before installing or upgrading CircuitPython.
Next, plug in your board using a USB data cable. Make sure the USB cable is a data cable: there are some that work only for charging and can lead to a lot of frustration.
Nearly all CircuitPython boards ship with a bootloader called UF2 (USB Flashing Format) that makes installing and updating CircuitPython quick and easy.
The bootloader is the mode your board needs to be in for the CircuitPython .uf2 file you downloaded to work.
However, if the file ends in .bin, you have to do a more complex installation - go to this page for details.
Tap the reset button twice to enter the bootloader. The rhythm of the taps needs to be correct and sometimes it takes a few tries. If you have a Circuit Playground Express, and it’s fresh-out-of-the-bag try pressing the button once.
Once successful, the RGB status LED(s) on the board will flash red and then stay green. A new drive will show up on your computer.
The drive will be called [boardname]BOOT where [boardname] is a reference to your specific board.
For example, a basic Feather will have FEATHERBOOT.
For RP2040 boards: the drive will be called RPI-RP2 on all RP2040 boards.
Going forward, the bootloader drive will be referred to as the boot drive for simplicity. The board is now in bootloader mode.
Find the file you downloaded. Drag that file to the boot drive on your computer. The lights should flash again, boot will disappear and a new drive will show up on your computer called CIRCUITPY.
Congratulations! You’ve successfully installed or updated CircuitPython!
Code with CircuitPython
To create and edit code, all you’ll need is an editor. Some light-weight IDEs are:
- Visual Studio Code
- Thonny which is installed by default on Raspberry Pi OS
- Mu
Adafruit strongly recommends using Mu. It’s designed for CircuitPython, and it’s really simple and easy to use, with a built-in serial console.
Installing CircuitPython generates a code.py file (or main.py) on your CIRCUITPY drive.
Edit this file with the code below:
import board
import digitalio
import time

led = digitalio.DigitalInOut(board.LED)
led.direction = digitalio.Direction.OUTPUT

while True:
    led.value = True
    time.sleep(0.5)
    led.value = False
    time.sleep(0.5)
Your code changes are run as soon as the file is done saving. Therefore, don’t click reset or unplug your board.
The CircuitPython code on your board detects when the files are changed or written and will automatically re-start your code. This makes coding very fast because you save, and it re-runs. If you unplug or reset the board before your computer finishes writing the file to your board, you can corrupt the drive. If this happens, you may lose the code you’ve written, so it’s important to make a backup of your code regularly.
There are a couple of ways to avoid filesystem corruption:
- Use an editor that writes out the file completely when you save it,
- Eject or sync the drive after writing
Conclusion
The journey with Adafruit world is at the very beginning. There will be lots of interesting articles in the future!
Documentation
Adafruit Products:
Useful links:
